 Save
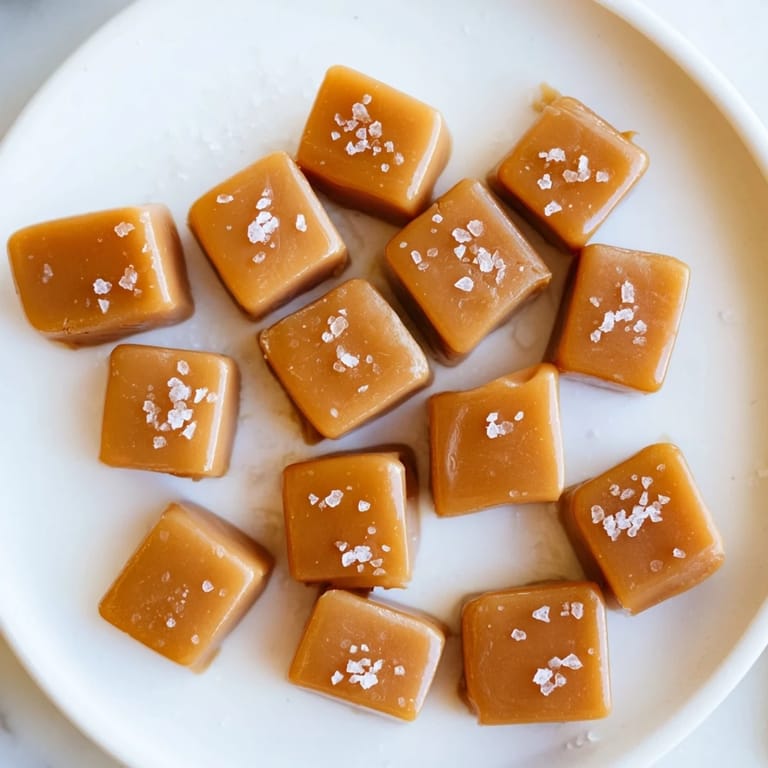
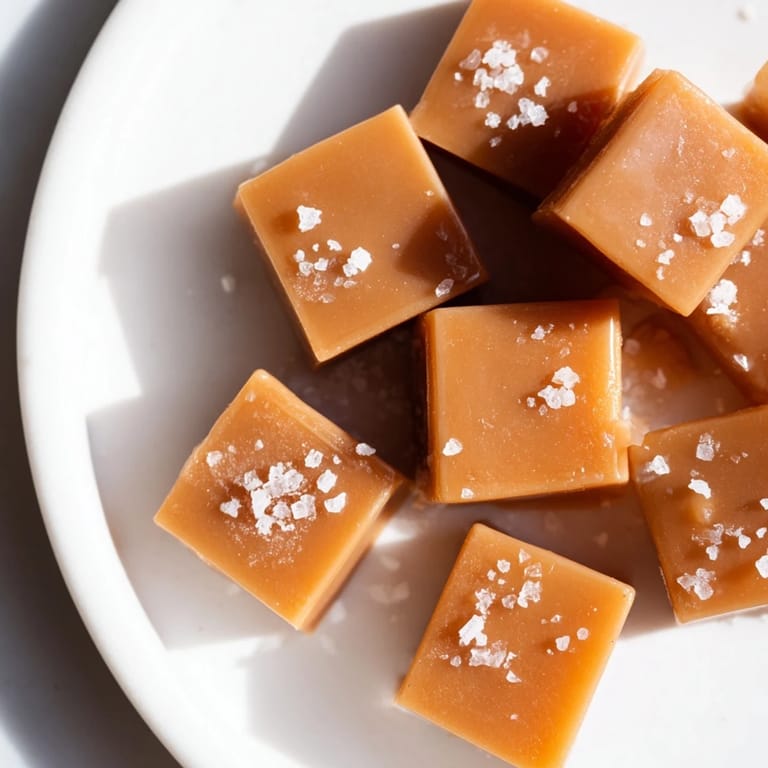
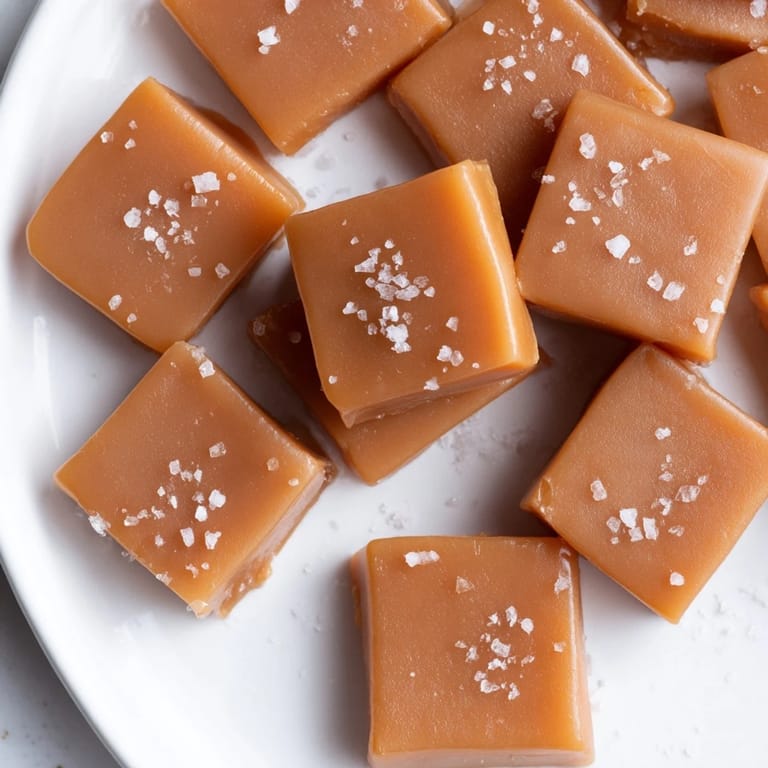
Save The first time I made sea salt caramels, I was standing in a friend's kitchen on a rainy Sunday afternoon, watching her pull a batch of homemade toffees out of her oven. She let me taste one, and the way the buttery sweetness melted into that sharp, mineral finish from the sea salt completely changed what I thought candy could be. That afternoon, I became obsessed with recreating that exact magic—the kind that makes you close your eyes for a second and just appreciate the moment.
I brought a batch to my book club last month, and someone asked if I'd bought them from a fancy confectioner downtown. When I said I made them at home, the whole room got quiet for a moment—the kind of quiet that means you've impressed people without trying. That's when I knew this recipe was worth keeping close.
Ingredients
- Heavy cream: This is where the caramel gets its luxurious texture, so use full-fat cream if you can find it.
- Unsalted butter: Room to control the salt balance yourself, and it adds that rich, melt-on-your-tongue quality.
- Granulated sugar: The foundation of everything; don't skip the corn syrup because it prevents crystallization and keeps your caramels glossy.
- Light corn syrup: This is the secret ingredient that stops your caramel from turning grainy.
- Water: Just enough to help the sugar dissolve evenly before it caramelizes.
- Vanilla extract: A whisper of flavor that rounds everything out without taking over.
- Fine sea salt (for the mixture): Different from the flaky salt on top—this one dissolves into the caramel itself for depth.
- Flaky sea salt (Maldon or similar): Save this for the finish; the bigger crystals give you those moments of pure salt against pure caramel.
Tired of Takeout? 🥡
Get 10 meals you can make faster than delivery arrives. Seriously.
One email. No spam. Unsubscribe anytime.
Instructions
- Prepare your pan:
- Line an 8x8-inch pan with parchment paper, leaving overhang on two sides so you can lift everything out later. Lightly butter the parchment so nothing sticks.
- Warm your cream:
- In a small saucepan, combine heavy cream and butter over medium heat. Watch it carefully—you want it hot and steaming but never boiling. This warm mixture is what you'll pour into the hot caramel, so having it ready is half the battle.
- Start the caramel:
- Combine sugar, corn syrup, and water in a large, heavy-bottomed saucepan. Stir gently just to combine, then stop stirring. Let it cook over medium heat until the sugar fully dissolves—you'll see the liquid become clear.
- Let it color:
- Turn heat to medium-high and bring to a boil. Now comes the moment of trust: don't stir, just watch and wait. The mixture will go from clear to pale yellow to light golden. Use a candy thermometer to reach exactly 320°F—this is where the magic temperature sits.
- Add the cream carefully:
- This is the most dramatic moment. Slowly pour your warm cream mixture into the caramel while stirring constantly. It will bubble and hiss like you've just performed alchemy, which honestly, you have. Keep stirring and cooking until the thermometer hits 245°F for soft caramels, or up to 250°F if you like them slightly firmer.
- Finish and pour:
- Remove from heat and quickly stir in vanilla extract and fine sea salt. Immediately pour the hot caramel into your prepared pan—speed matters here because caramel sets fast. Let it sit for five minutes, then sprinkle flaky sea salt evenly across the top.
- Cool completely:
- Leave the pan at room temperature for about two hours. This is the hardest part because it smells incredible and you want to eat them right now. Resist.
- Cut and wrap:
- Once completely cool, lift out using your parchment overhang. Using a sharp knife (warming it under hot water between cuts helps), slice into 1-inch squares. Wrap each piece in wax paper or cellophane to prevent sticking and keep them fresh.
 Save
Save I gave a box of these to my neighbor last week when she was going through a rough time, and she texted me three days later asking if I could make her another batch. That's when I realized these caramels are more than just candy—they're a small, edible way of saying 'I see you' to someone you care about.
The Brown Butter Secret
If you're feeling adventurous and want to push the flavor even deeper, try browning your butter before you warm it with the cream. You'll need to watch carefully—the butter goes from golden to burnt faster than you'd think. When it's perfect, it smells like toasted hazelnuts and caramelized sweetness. That nutty note stays in the background of the caramel like a bass line in music, making everything taste more complex and sophisticated.
Chocolate Dipping and Beyond
The notes suggest dark chocolate, and that's genuinely transformative—temper some good dark chocolate and dip each caramel halfway, then set them on parchment to cool. But I've also tried milk chocolate for a sweeter take, and once I used white chocolate with a tiny pinch of cinnamon on top before it set. The caramels are delicious on their own, but dipping them opens up a whole second life where you can play with flavor combinations and make boxes that feel like little gifts to yourself or others.
Storage and Keeping Them Fresh
These caramels will stay fresh and glossy in an airtight container at room temperature for up to two weeks, though honestly they rarely last that long. The wax paper wrapping keeps them from sticking together, which seems small but makes such a difference when you're reaching for one in the middle of the afternoon. If you live somewhere hot and humid, you might want to store them in the refrigerator, but let them come to room temperature before eating so the texture is perfect.
- Keep them away from direct sunlight or they'll start to look dull and the colors will fade.
- If they do start to stick together despite the wrapping, separate them with parchment between each layer in your container.
- Make a fresh batch every week or two if you have people in your life who expect them—which, trust me, you will.
 Save
Save Making sea salt caramels is one of those small kitchen skills that feels fancy but is actually very doable, and the confidence boost from nailing a batch is real. Once you've made them, you'll find yourself making them again and again, each time maybe tweaking something small, discovering what you love most about them.
Questions & Answers
- → How do I achieve the perfect soft caramel texture?
Cook the sugar mixture to 320°F before adding cream and butter, then heat to 245°F for soft but set caramels. Monitoring temperature ensures ideal softness.
- → Can I add flavors to these caramels?
Yes, vanilla extract is added for warmth, but you can also experiment with spices or citrus zest to customize flavors.
- → Why is flaky sea salt used as a finishing touch?
Flaky sea salt adds a crunchy texture and enhances the caramel's rich sweetness with a contrast of subtle saltiness.
- → What is the best way to store these confectioneries?
Store in an airtight container at room temperature for up to two weeks to maintain texture and flavor.
- → Is browning the butter necessary?
Not required but browning the butter before adding gives a deeper, nutty complexity to the final taste.