 Save
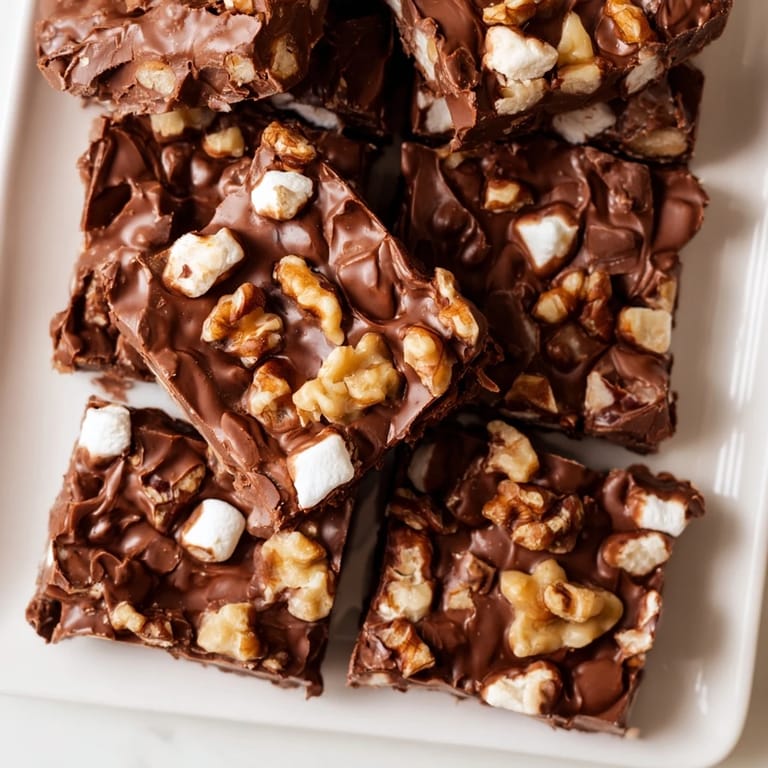
Save My neighbor Margaret brought a tin of rocky road fudge to our book club one evening, and I watched it disappear faster than anyone could turn a page. The combination of melting chocolate, marshmallow pockets, and nutty crunch was so simple yet so compelling that I asked for her recipe that night. She laughed and said it wasn't fancy or complicated, which somehow made it even more appealing. Since then, this fudge has become my go-to when I need something that feels both homemade and impressive without actually requiring any real skill.
I made this for my daughter's science fair bake sale, and a kid actually came back asking if we'd be making it again next year. His mom bought three boxes. That single moment reminded me that sometimes the most memorable food isn't the fanciest, it's just the one that hits exactly right in the moment.
Ingredients
- Semi-sweet chocolate chips (3 cups): These form the backbone of everything, so don't skimp on quality. Cheaper chips can taste waxy, and you'll notice it immediately in something this simple.
- Sweetened condensed milk (1 can, 14 oz): This is the secret to the creamy texture that makes the fudge melt on your tongue rather than be tough and crumbly.
- Unsalted butter (4 tbsp): Adds richness and helps everything combine smoothly. I always cube it first so it melts faster and more evenly.
- Vanilla extract (1 tsp): Just enough to add depth without making the fudge taste like a vanilla cake.
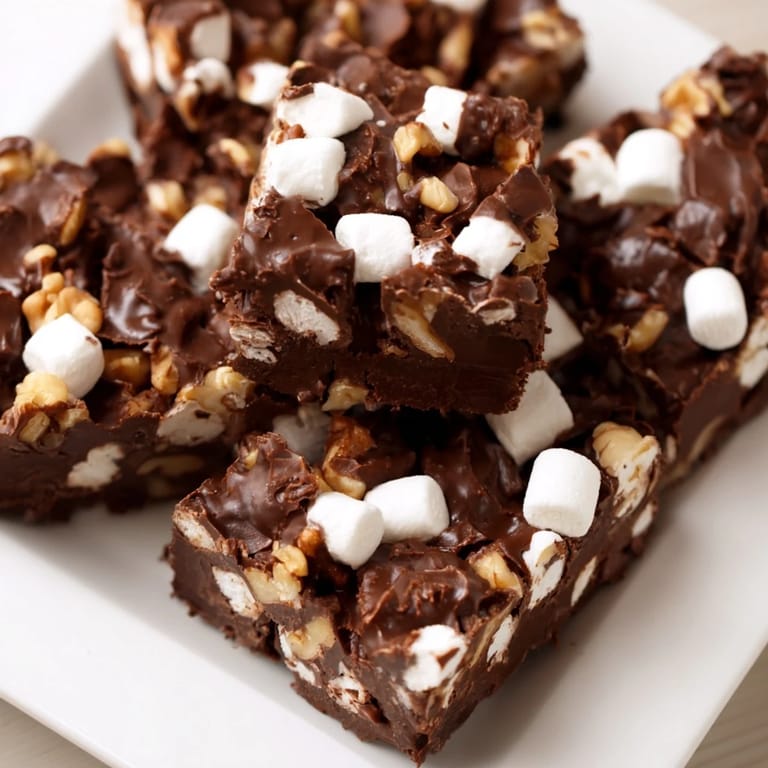
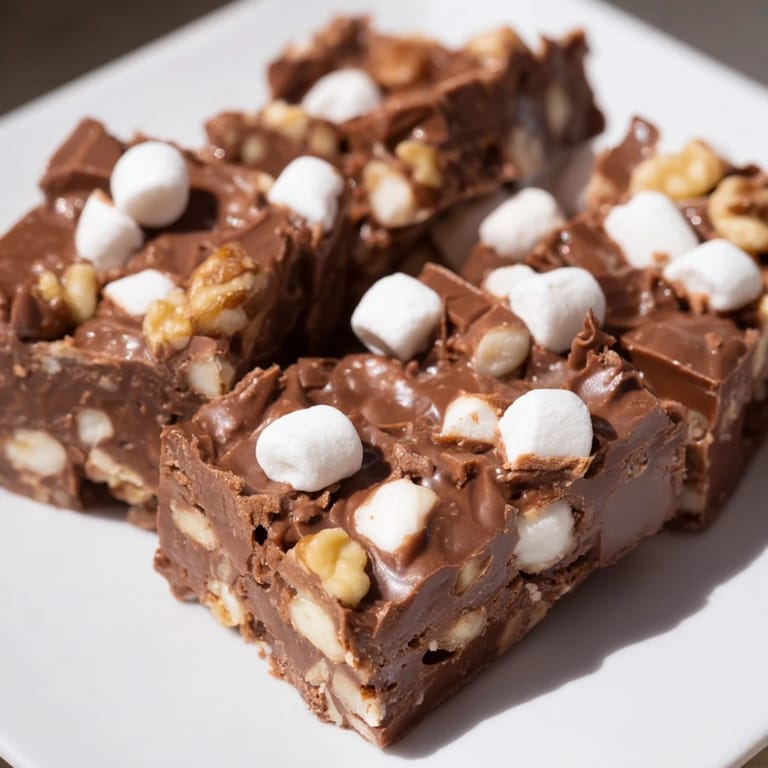
- Mini marshmallows (1½ cups): They stay fluffy pockets rather than dissolving into the chocolate because you fold them in after everything cools slightly.
- Chopped walnuts or pecans (1 cup): The crunch is essential here. Toast them lightly if you want more flavor, or skip it if you prefer subtlety.
Tired of Takeout? 🥡
Get 10 meals you can make faster than delivery arrives. Seriously.
One email. No spam. Unsubscribe anytime.
Instructions
- Set up your stage:
- Line your 8x8-inch pan with parchment paper, making sure some hangs over the edges so you can lift the finished fudge out cleanly later. This step saves you from having to scrape melted chocolate off the pan edges.
- Melt the base:
- Combine chocolate chips, condensed milk, and butter in a medium saucepan over low heat, stirring constantly. The low heat is crucial here because chocolate can seize or scorch if the heat is too high, turning grainy and unpleasant.
- Add the vanilla:
- Once everything is smooth and silky, pull the pan off the heat and stir in the vanilla extract. You'll notice the fudge smells almost too good to resist.
- Fold in the textures:
- Gently fold in the marshmallows and chopped nuts, working carefully so the marshmallows stay intact rather than getting smooshed into the chocolate. This is where the fudge becomes interesting.
- Pour and spread:
- Transfer the mixture to your prepared pan and spread it evenly with a spatula. You want an even thickness so every piece cooks the same way.
- Chill and set:
- Refrigerate for at least 2 hours, though overnight is even better if you can wait. The fudge hardens into that perfect snap-and-melt texture that makes it so craveable.
- Cut and store:
- Use the parchment overhang to lift the whole block out, then cut into 24 squares with a sharp knife. A little warm water on the knife between cuts helps prevent the chocolate from sticking.
 Save
Save There's something deeply satisfying about giving a handmade tin of this fudge to someone and seeing their face light up when they taste it. It's become my unofficial gift for neighbors, teachers, and people I want to thank without making a big deal about it.
The Texture Trick
The reason this fudge works so well is because condensed milk keeps it from ever being too firm or too grainy. Regular chocolate fudge can end up chalky if you're not careful, but the condensed milk creates this butter-smooth texture that holds up to the marshmallows and nuts. I learned this the hard way after making a batch with just chocolate and butter, which turned out nothing like Margaret's. Once I switched to her method, it was perfect immediately.
Variations and Experiments
The beauty of rocky road is how forgiving it is if you want to play around. My friend swears by adding crushed graham crackers for extra crunch, while my brother adds a pinch of sea salt to make the sweetness more interesting. I've even made a batch with almonds instead of walnuts when that's what I had on hand, and it was equally delicious.
Serving and Pairing
Serve these straight from the fridge because the cold brings out the best texture contrast. They're perfect alongside a cup of strong coffee that cuts through the richness, or with cold milk if you want something more casual. I've learned that fudge tastes better when you eat it slowly enough to actually experience all the textures instead of just wolfing it down.
- Keep these stored in an airtight container in the fridge for up to a week, or freeze them for longer storage without any loss of quality.
- If you're bringing them somewhere, pack them in a sturdy container with some parchment between layers so they don't stick together.
- These make excellent little gifts because they feel special without requiring anyone to believe you spent hours cooking.
 Save
Save This fudge has become my answer to the question of what to bring when I want to show up without overdoing it. It reminds me that some of the best things in life are simple enough to make on a weeknight.
Questions & Answers
- → What nuts work best in this chocolate treat?
Walnuts or pecans offer a great crunch and flavor, but almonds or hazelnuts can be used as tasty substitutes.
- → Can I alter the texture of this dessert?
Adding crushed graham crackers introduces extra crunch, complementing the soft marshmallows and creamy chocolate base.
- → How long should the chocolate squares chill?
Refrigerate for at least 2 hours to allow the mixture to firm up properly for easy slicing and serving.
- → What kitchen tools are needed for preparation?
A medium saucepan, spatula, baking pan lined with parchment paper, and a sharp knife are essential for smooth preparation and neat cutting.
- → Are there allergen considerations to keep in mind?
This treat contains dairy, nuts, and gelatin from marshmallows; check ingredient labels for gluten or soy cross-contamination if needed.
- → What beverages pair well with this sweet creation?
Cold milk or strong coffee are ideal companions, enhancing the rich and sweet flavors of the chocolate and nuts.